Mounting Sleeve Installation Instructions
by Woodford
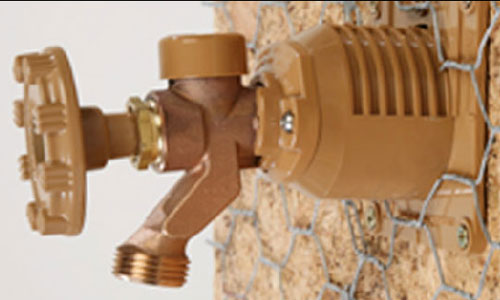
Woodford Mounting Sleeve

shown with Woodford faucet model 17
For use with Wall Faucet Models 14, 16, 17, & 19 only
The Woodford wall faucet mounting sleeve takes the guesswork out of how far to stub-out Woodford freezeless faucets through brick, stone, or stucco veneers. It also provides a secure anchor for the faucet.
The mounting sleeve allows the plumber to determine a stub-in location and set an adjustable finish depth required by the brick or stone mason. A number scale in increments of 1/2" is built into the top of the mounting sleeve (view me to see the number scale).
The faucet installation is completed by mating the faucet wall flange to the front of the mounting sleeve and securing with two furnished flange screws. The proper drain angle is automatically set by the rear tube rest. This reduces risk of freezing and ensures the faucet properly drains.
Step 1. The Woodford wall faucet mounting sleeve facilitates the installation of a wall faucet for multiple exterior finish applications such as lap siding, stone, stucco, or brick. The adjustable depth allows for firm and secure faucet installations regardless of finish material selections.

Step 2. Determine the wall surface where the mounting sleeve will be located and draw a level line, center, and drill a hole through using a standard self-feeding 2-9/16" bit.

Step 3. Align the bottom bracket, arrows pointing up, with the hole and level line. The mounting bracket can be installed on the interior or exterior wall. Using the four 2" wood screws provided, mount the bottom bracket.

Step 4. Slide the mounting sleeve through the hole. Then, using the 1/2 inch increment number scale located on the top of the mounting sleeve, select the appropriate mount depth as required by the planned finish application (brick, stucco, stone, etc.). Lock in the selected depth using the top bracket by sliding the bracket into place.

Step 5. Secure the top bracket using one of the mount screws provided.

Step 6. Insert your selected Woodford wall faucet and ensure the faucet rests securely on the rear tube rest which provides the proper faucet drain angle positioning. This will ensure proper draining of the faucet, reducing the chance of freezing.

Step 7. Secure the Woodford wall faucet to the wall mount sleeve.

Step 8. You are now ready to proceed with any exterior finish applications.

Step 9. Completed installation of wall mount sleeve and Woodford wall faucet.

Frequently Asked Questions
Q. "When should I use one of these mounting sleeve kits?"
A. These sleeve kits are best used when you are installing your Woodford wall faucet into brick, stucco, stone, or any other exterior wall that requires finish work.
Q. "Which Woodford faucets work with this mounting sleeve?"
A. These mounting sleeves work great with Woodford's outdoor faucet models: 14, 16, 17, & 19.
